This tutorial has become so large that I’m breaking it down into several sections. Each section will have its own page. As I reorganize, and add more content, I’ll expand this list of sections.
Section 1: What is a theme? Introduction to WinterBoard.
Section 2: Creating a basic theme.
Section 3: Changing program icons.
Section 4: Changing battery icons.
Section 5: Changing carrier logos.
Section 6: Changing Wi-Fi signal strength icons.
Section 7: Changing cellular signal strength bars.
Section 8: Changing keyboards.
Section 9: Changing sliders (with custom text and audio).
Section 10: Changing the progress wheel.
Section 11: Changing system sounds.
Section 12: Changing the SpringBoard page indicators.
Section 13: Simplifying the lock screen.Have a suggestion for expansion of this tutorial? |
Section 1: What is a theme? Introduction to WinterBoard.
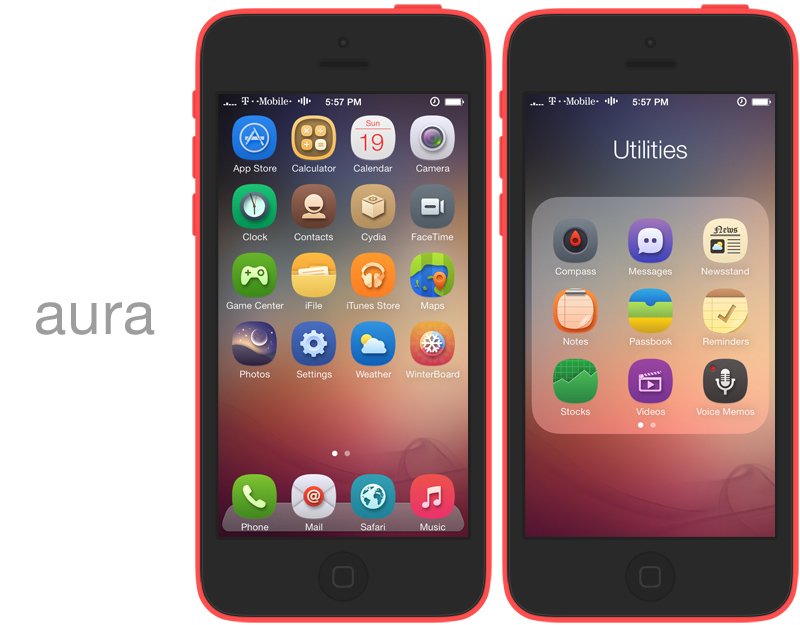
What is a theme? A theme is the graphical “look” of a phone. In the case of the iPhone, a theme consists largely of the way the SpringBoard, dock and all the program icons look. A theme can ultimately involve every single graphic being changed. Usually no one goes to that extent to customize their iPhone – it’s just too many graphics to change. There are a handful of graphics you can change to create a dramatic look, however.
You can change the iPhone’s appearance with a couple programs. You need Cydia, WinterBoard, OpenSSH (if you want to upload your own personal images), and a program to make your graphics with. I use Adobe Photoshop. GIMP is a free alternative to Photoshop, which is also a very powerful program. You can download GIMP here. If you don’t want to create your own images, you can use the themes that are already available through Cydia in the various “Themes” folders.
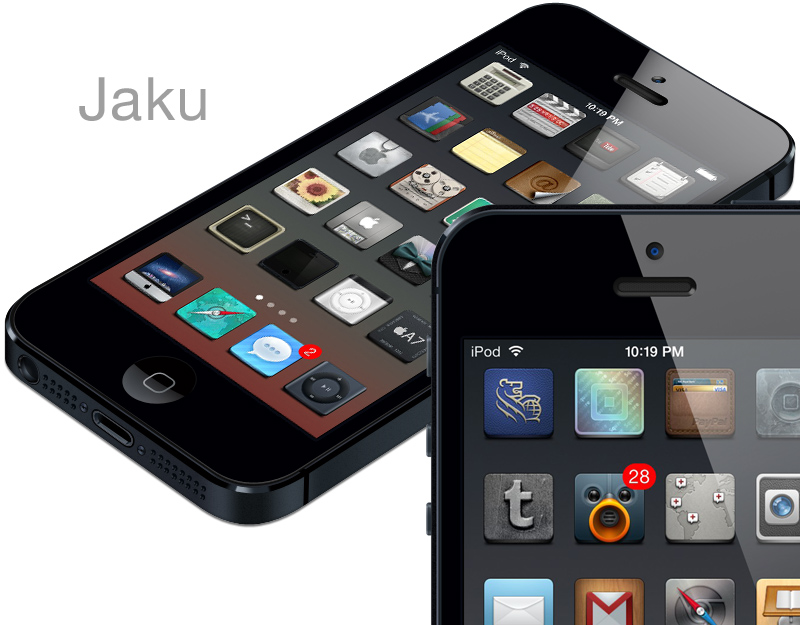
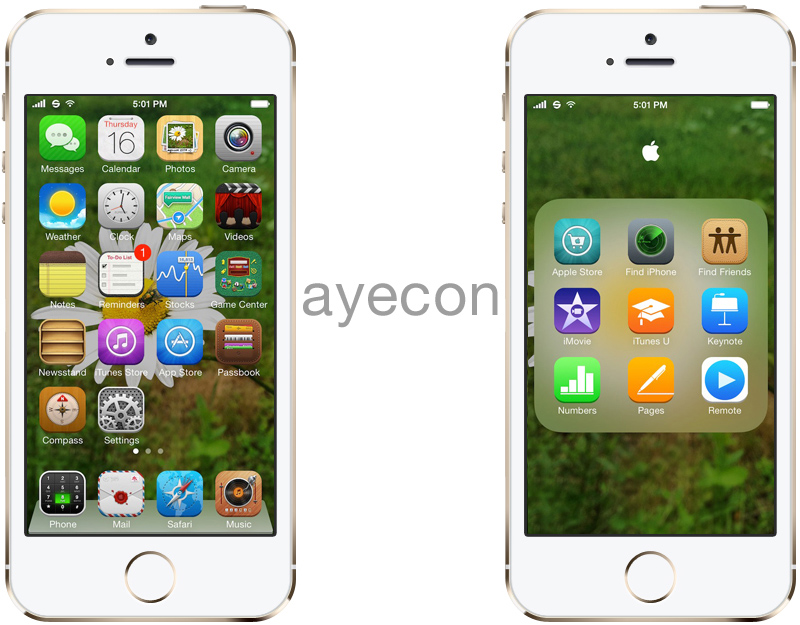
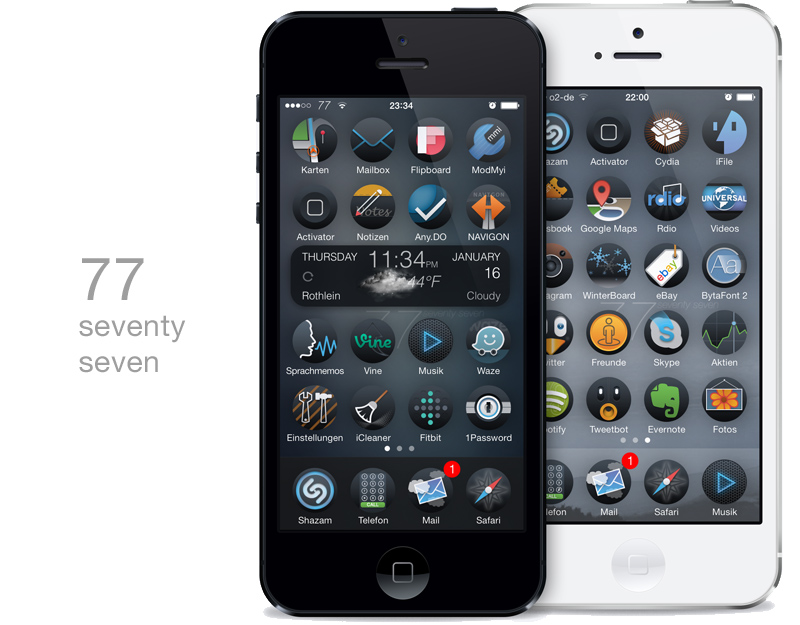
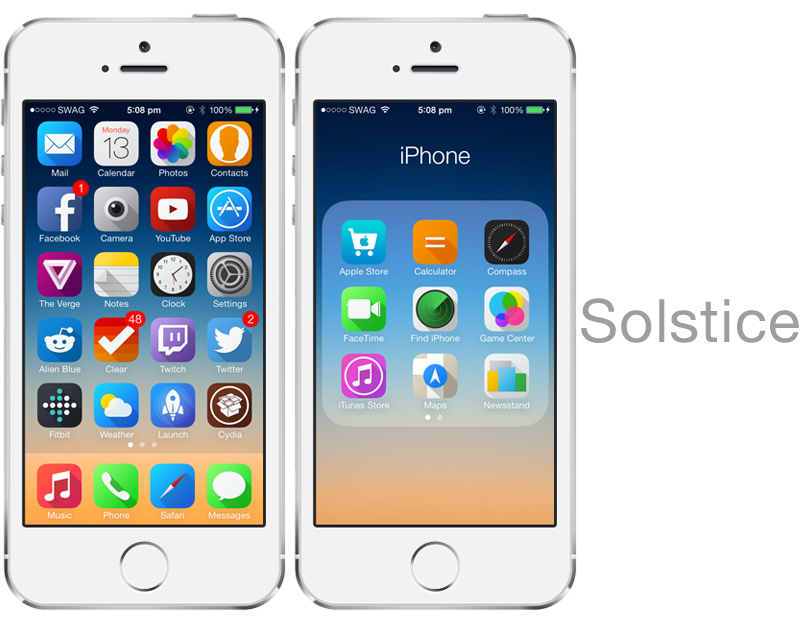
Here are some examples of themes that are available for 2.x firmware. In order are: iWood-Realize, CandyMilk, VendingMachine, and iVintage.
Once you have installed WinterBoard (I’ll cover this in the next section), and launch it, you will see you are given several options in the main menu. First let’s press Saurik. This is the only theme that comes with WinterBoard by default. It will only change the background wallpaper in the SpringBoard, but it will use scripting to dissolve between two different images. When you have selected a menu item a check mark will appear next to it. To undo a selection, just press it again. Then press your Home button and WinterBoard will load your changes to apply the new theme.
The iPhone will display the spinning wheel, and chirp. It will then send you back to the slide to unlock screen.
Once you slide to unlock, you should now have a new wallpaper image on your SpringBoard. If you wait a few seconds it will blend into another background image. You can also do this with your own images. At this point, you could just continue to use Cydia and check the various themes folders to install themes automatically.
Let’s explore the other options in WinterBoard. The first one is Black Navigation Bars. Here’s the before and after.
Server Lock Example uses an HTML file to call some text from a server and display it on your lock screen.
Solid Status Bar, makes the status bar appear white at all times.
Transparent Dock, before and after.
Transparent Icon Labels.
User Wallpaper will set whatever image is on your lock screen as your SpringBoard wallpaper.
One final note, and I’m probably getting ahead of myself here, but this didn’t seem to fit anywhere else. WinterBoard processes themes from the top of its list to the bottom. You can drag and drop themes, changing their order of execution on the list. Why does this matter? Let me demonstrate.
In this screen shot I have a lot of themes in my list. I like using Cool Notes, which changes the standard Notes application to white paper with blue lines and it changes the program icon on the SpringBoard.
I have my own theme “My first theme” which uses another icon that I prefer to use with Notes. So I simply drag Cool Notes, below My first theme, and note the change.
That’s ordered priority. Are you hooked yet? The sky is the limit with themes. Let’s try creating our own…
Section 2: Creating a basic theme.
Step 1.
First we need to install WinterBoard. Launch Cydia.
Press the Sections button at the bottom, and press All Packages. Scroll down the list and press WinterBoard.
Note: WinterBoard is updated often. There is no way this tutorial can be updated as frequently to reflect the current version of the program, including all the changes that would appear in my various sections, and screen shots. Your mileage may vary.
Press the Install button. Once it has finished installing, press the Reload SpringBoard button.
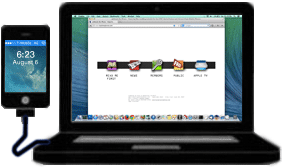
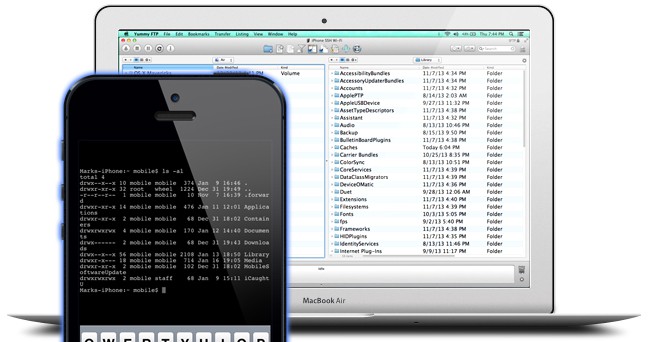
I will be using Fugu to upload the files for this tutorial. Fugu can be used to transfer or remove any files you want to your iPhone, provided you already have SSH installed. If you have not installed OpenSSH, or used Fugu before, then you must read this tutorial first.
Should you decide to directly replace a graphic on the iPhone, always make a backup copy of the file you intend to replace first. If you should make a mistake, you can always revert to the original files. Do not destroy/overwrite original system files (without a backup), or a restore may be in order! Since we are using WinterBoard, you won’t have to worry about this.
You will need the following items to make the basic theme I am going to demonstrate. They will go within your custom theme folder.
-
- StatusBar.png (this is the staus bar image where the carrier name, Wi-Fi icon, time and battery strength icon appear, it is optional and is 320×20. It has no alpha (transparency) set.
-
- Wallpaper.png (this is the image that covers the SpringBoard, and is 320×480 with no alpha).
-
- SBDockBG.png (this is the dock background image where the phone, mail, safari and ipod icons reside, it is 320×91 with alpha).
- Application icons (60×60, PNG with alpha, these icons get placed in the YourCustomTheme/Icons folder). You don’t have to swap out the stock icons if you don’t want to. If no icons are present in this folder, then the stock icons will be used
Note: If you replace any graphic with your own custom graphic, make sure you are saving the file as a png, and that it retains the same dimensions as the original.These are the names you must use to replace the original 20 icons: AppStore.png Calculator.png, Calendar.png, Camera.png, Chat.png, Clock.png, Contacts.png, iPod.png, iTunes.png Mail.png, Maps.png, Notes.png, Phone.png, Photos.png, Safari.png, Settings.png, Stocks.png, Text.png, Weather.png, YouTube.png. As long as you name your icon the exact same thing as the name of the application, you can replace anything.
You can replace any other images with WinterBoard, by uploading the new graphics using SSH, like the signal strength indicators, battery icons, et cetera. These images will go into your theme folder, not to the original images’ location. WinterBoard will “map” these images, so to speak, to take the place of the original images when you use your theme.
Use my graphics locations page to determine the location of many popular images. I also have a tutorial on changing other graphics (via directly overwriting the original images) here. This is an option if you would like a simpler method of replacing images, and do not intend to use Cydia or WinterBoard.
To learn more about advanced theme techniques, read this page from Saurik’s site (the creator of Cydia and WinterBoard). I am only going to scratch the surface of what WinterBoard can do.
Step 2.
Launch Fugu. WinterBoard themes should be installed at: /private/var/stash/Themes.xxxxxx Where .xxxxxx will be a series of random letters and numbers. On three different installs, my folders were called Themes.rUGqw2, Themes.shiHte, and Themes.3Oxlbn. Note: You may see instructions telling you to place your themes in /Library/Themes. This is symlinked to /private/var/stash.
You need to make a unique folder for each theme you design. If you install themes from Cydia, they will make their own folders. Note: If you find a theme on Cydia that you like and want to learn how they did it, look in this themes folder for it. Then you can see exactly what folders, et cetera they used to tweak a specific graphic(s) with.
Saurik.theme is created when you install WinterBoard. Note: This is the only time I will show the entire program window for Fugu, in the interest of having a faster loading page.
| If you go into the Saurik folder you will see several items here. Items in bold represent folders. Here is the directory structure:
Saurik.theme
Bundles
com.apple.springboard
SBDockBG.png (this is the dock image on the SpringBoard)
Info.plist
Private
Plant.png
Rock.png
UISounds
Tock.caf
Wallpaper.html
In this case, the Saurik theme uses the Wallpaper.html file to “toggle” the two images contained in the Private folder: Plant.png and Rock.png. If you open the .html file and examine the source code you will see how this is done. I am not going to provide any lessons in HTML or CSS scripting. There are plenty of sites you can learn this at. Using a .html file you can easily achieve what is accomplished with the Saurik theme. The Tock.caf symlink is just to demonstrate how an audio file would be replaced. Just name your file the same thing as the file you wish to replace and it will be handled when using this theme.
Note: You do not have to use a .html file if all you want is a static image for your wallpaper. |
I’m going to make a simple theme. I’m calling it My first theme. It will be placed in the same folder as the Saurik folder. To create your folder, click the New Folder button. Enter your name and make sure the button Remotely is darkened, then click the Create button.
You should now see your new theme folder. Double click it to go into it.
Create your wallpaper image and place it into the folder you just made. Make sure the image is called Wallpaper.png
Click the New Folder button, and name it Bundles Make sure it is being created Remotely, then click the Create button.
You should now see this. Go into the Bundles folder.
Click New Folder button, and name it com.apple.springboard Make sure it is being created Remotely, then click the Create button.
You should now see this.
Go into the com.apple.springboard folder. Place your new dock image, called SBDockBG.png here.
Go back to your My first theme folder (or whatever you named it), by clicking the blue up arrow to the right of your current directory folder. Create your status bar image and copy it into this folder. It must be called StatusBar.png Keep in mind you should avoid making this graphic solid white or black because it will react badly with some stock system graphics.
At this point you can check out how your theme is coming along. Launch WinterBoard and select your theme’s name. You should see your SpringBoard reset and you will be sent back to the slide to unlock screen. You should see a different status bar, dock, and wallpaper image.
Ready to change the program icons now?
Section 3: Changing program icons.
Note: If you replace any graphic with your own custom graphic, make sure you are saving the file as a png, and that it retains the same dimensions as the original. Use my graphics location page for the original images for all the stock programs.
There are two methods for changing program icons: the WinterBoard way, and the old SummerBoard way – which WinterBoard still recognizes.
Method 1.
The WinterBoard way is a more proper way, but more time consuming. You should be in your theme folder at this point.
Press the New Folder icon and name this folder Folders.
You should now see this. Go into the Folders folder.
Click the New Folder icon and name this folder AppStore.app (or whatever application folder you would like to replace the icon for).
You should now see this. Go into the AppStore.app folder.
Now copy your new graphic into this folder. Make sure to name it the same thing as the graphic it is to replace. Not all application icons are named icon.png.
Check your work by launching WinterBoard and selecting your theme. You’ll have to press it twice: once to unselect it, and again to reselect it, so it’ll reload your changes. Then press the Home button. There’s my inverted AppStore icon. Delete this icon at this point, unless you want to keep the App Store upside down.
Method 2.
Now I’ll cover the old SummerBoard method for program icon changing, which WinterBoard still recognizes. You should be in your theme folder.
Click the New Folder button, and name it Icons Make sure it is being created Remotely and click Create.
Double click your Icons folder.
Now copy your new icons into this folder. Name your icons after the name of the application you wish to replace.
Launch WinterBoard, and press your theme’s name twice to reload it. Then press the Home button.
Ready to change the battery icons now?
Section 4: Changing battery icons.
Note: If you replace any graphic with your own custom graphic, make sure you are saving the file as a png, and that it retains the same dimensions as the original. You can get all the original battery images at my graphics directory here.
Let’s change the battery icon next. This is the main battery graphic that appears only when the iPhone is plugged in to a power source. Note: I’ve changed my StatusBar graphic back to a solid black bar.
Step 1.
The easiest way to swap out the battery graphics are to turn them into their own theme. With WinterBoard you can mix and match different theme sets into your own unique arrangement. As you select which elements you want to display on the iPhone, WinterBoard will combine them all together, making a new theme.
Let’s go back to the folder where we created the folder My first theme.
Click the New Folder icon and name your battery theme whatever you’d like. Make sure the folder is being created Remotely, then click Create.
Double click the folder you just created to enter it.
Now create a folder called Folders.
You should now see this.
Double click this folder to enter it. Create a new folder and call it SpringBoard.app.
Now double click this folder to enter it.
Step 2.
Place all of your custom battery images in this folder. Your folder should look like this when you are done. Just to double check, your battery images are in /private/var/stash/Themes.xxxxxx/Duracell battery (main)/Folders/SpringBoard.app. Remember Themes.xxxxxx is a unique name, your Xs will be replaced by various letters and numbers.
Launch WinterBoard, and select your battery theme. My first theme should already be selected. You are now combining these two themes together. Here is your finished product.
Step 3.
Let’s change the small battery icons now. The ones I am changing will only display when the iPhone is being charged. We will repeat the same process as above. Make a new theme folder and call it Duracell battery (small). Make a Folders folder, and a SpringBoard.app folder. Place your images in this folder. When you are done it should look like this.
Launch WinterBoard, and select the new theme to be added.
Here’s what the battery looks like on black and on white.
Ready to change the carrier logos?
Section 5: Changing carrier logos.
Note: If you replace any graphic with your own custom graphic, make sure you are saving the file as a png, and that it retains the same dimensions as the original.
Now I’ll change the carrier logo. Keep in mind I live in the United States. I’m going to change the AT&T; logo, and the T-Mobile logo. Note, I’ve changed my status bar back to its normal color, as the red won’t look good with the T-Mobile logo. Here is the stock AT&T; logo…
Step 1.
Go back to your Themes.xxxxxx folder. Click New Folder, and name your folder AT&T; logos. Make sure it is being created Remotely, then click Create.
Go into the AT&T; logos folder.
Create a folder called Bundles.
Go into the Bundles folder.
Create a folder called com.apple.ATT_US
Go into this folder.
Place your alternate AT&T; logos in this folder. You can download the logos I’m using here. Your folder should look like this.
Step 2.
Launch WinterBoard and select AT&T; logos, and press the Home button.
Step 3.
If you would like to use alternate T-Mobile logos, then the process is very similar as with the AT&T; logos. Create this path in your Themes.xxxxxx folder: T-Mobile logos/Bundles/com.apple.Unknown Place your logos in the com.apple.Unknown folder and use WinterBoard to switch them out. You can download the logos I use below here.
Ready to change the Wi-Fi signal strength graphics??
Section 6: Changing Wi-Fi signal strength icons.
Note: If you replace any graphic with your own custom graphic, make sure you are saving the file as a png, and that it retains the same dimensions as the original. You can get all the original Wi-Fi icons at my graphics directory here.
I’m going to use a theme on Cydia called MiWiFi to demonstrate how to change the Wi-Fi signal strength icons. In this case, eight graphics must be replaced to replicate the various signal levels on both black and white status bar backgrounds. These files are: Default_0_AirPort.png, Default_1_AirPort.png, Default_2_AirPort.png, Default_3_AirPort.png, FSO_0_AirPort.png, FSO_1_AirPort.png, FSO_2_AirPort.png, FSO_3_AirPort.png.
Step 1.
You should be at your Themes.xxxxxx folder. Create a new folder called Wi-Fi icons (color).
Then go inside this folder.
Create a folder called Folders.
Then go inside this folder.
Create a folder called SpringBoard.app
Then go inside this folder.
Now place all your Wi-Fi icons in this folder. It should look like this when you are done.
Step 2.
Launch WinterBoard and select your Wi-Fi icons theme. Here’s what it looks like.
Ready to change the cellular signal strength graphics?
Section 7: Changing cellular signal strength bars.
Note: If you replace any graphic with your own custom graphic, make sure you are saving the file as a png, and that it retains the same dimensions as the original. You can get all the original signal strength images at my graphics directory here.
I am going to use a theme in Cydia called Color Signal Bars, to demonstrate how to change the cellular signal strength bars. In this case, 12 graphics must be created to replace the various signal levels on both a black and a white status bar. These files are named: Default_0_Bars.png, Default_1_Bars.png, Default_2_Bars.png, Default_3_Bars.png, Default_4_Bars.png, Default_5_Bars.png, FSO_0_Bars.png, FSO_1_Bars.png, FSO_2_Bars.png, FSO_3_Bars.png, FSO_4_Bars.png, and FSO_5_Bars.png.
Step 1.
You should be at your Themes.xxxxxx folder. Create a new folder called Cellular signal icons.
Now go inside this folder
Make a folder called Bundles
Now go inside this folder
Make a folder called com.apple.springboard
Now go inside this folder.
Now place all your cellular signal icons in this folder. It should look like this when you are done.
Step 2.
Launch WinterBoard and select your Cellular signal icons theme. Here’s what it looks like.
Ready to change the keyboard graphics?
Section 8: Changing keyboards.
Note: If you replace any graphic with your own custom graphic, make sure you are saving the file as a png, and that it retains the same dimensions as the original.
I am going to use a theme in Cydia called MacBook Air Keyboard, to demonstrate how to change a keyboard. In this case, 154 graphics must be created (or at least that’s how many are in this particular theme) to replace the various keys. This is a massive project, should you want to create your own custom keyboard, but it can be done. You can see the full list of file names in this theme should you decide to download it.
Step 1.
You should be at your Themes.xxxxxx folder. Create a new folder called MacBook Air keyboard.
Go inside this folder.
Make a new folder called UIImages.
Go inside this folder. Then copy all of your keyboard images into it.
Step 2.
Launch WinterBoard and test out your new keyboard.
Ready to change the slider graphics?
Section 9: Changing sliders (with custom text and audio).
Note: If you replace any graphic with your own custom graphic, make sure you are saving the file as a png, and that it retains the same dimensions as the original.
I am going to use a theme in Cydia called iZipper sliders to replace the slide to unlock, slide to power off, slide to answer buttons, and the graphic that goes under the text that appears next to the buttons. This consists of four images: bottombarbkgndlock.png, bottombarknobgray.png, bottombarknobgreen.png, and bottombarknobred.png. There is also the text highlight mask image bottombarlocktextmask.png.
These are the original images.
Step 1.
You should be at your Themes.xxxxxx folder. Create a new folder called iZipper sliders.
Go inside this folder.
Make a new folder called Folders.
Go inside this folder.
Make a new folder called TelephonyUI.framework
Go inside this folder.
Place your images into this folder.
Step 2.
If you would like to change the text that says “slide to unlock”, now is the time. Using Fugu, navigate to /System/Library/CoreServices/SpringBoard.app/English.lproj. Then download the file called SpringBoard.strings. I used BBEdit to edit and save the file. You can get a trial version of this program here. Open the file. Go to line 27 and verify that it says AWAY_LOCK_LABEL. If it does, then change the line below it to whatever you’d like it to say. Note: I couldn’t figure out how to make WinterBoard load this .strings file, so after renmaing the original file, I copied this file manually to the iPhone. If I figure out how to automate this, I’ll update this tutorial.
Step 3.
I also switched out the standard lock sound for an opening zipper sound. You can download this sound from me here.
To add this sound, go into your iZipper sliders folder, and create a folder called UISounds.
Copy your unlock.caf into this folder.
Step 4.
Launch WinterBoard and try out your new theme.
Ready to change the spinning wheel graphic?
Section 10: Changing the progress wheel
Note: If you replace any graphic with your own custom graphic, make sure you are saving the file as a png, and that it retains the same dimensions as the original.
I am going to use a theme in Cydia called Retro Loaders to replace the stock spinning wheel that you will see when loading a webpage, refreshing Cydia, et cetera.
There are 84 images (at least with the two styles of loaders I tested), but I’m sure you could make your own using fewer images. There are three different sizes of these loaders, they rotate and they have to look good on black and white status bars.
Step 1.
You should be at your Themes.xxxxxx folder. Create a new folder called Retro Loaders.
Go inside this folder.
Make a new folder called UIImages.
Now go inside this folder.
Copy all your images into this folder.
Step 2.
Launch WinterBoard and check out your new graphics.
Ready to change the system sounds?
Section 11: Changing system sounds
If you read Section 9: Changing sliders (with custom text and audio), you saw how I changed the sound associated with sliding to unlock the iPhone. I applied this sound using a theme, by placing the new sound file into the UISounds folder of the theme.
I am going to repeat part of that lesson and also provide you with the names of all the sound files on the iPhone so you can swap them all out, should you wish.
| These are the audio files in the /System/Library/Audio/UISounds folder on 2.0.2 firmware:
alarm.caf
beep-beep.caf – is the sound played when docking the iPhone.
ct-busy.caf
ct-call-waiting.caf
ct-congestion.caf
ct-error.caf
ct-keytone2.caf
ct-path-ack.caf
dtmf-0.caf – is the sound played when pressing 0 on the phone keypad.
dtmf-1.caf – is the sound played when pressing 1 on the phone keypad.
dtmf-2.caf – is the sound played when pressing 2 on the phone keypad.
dtmf-3.caf – is the sound played when pressing 3 on the phone keypad.
dtmf-4.caf – is the sound played when pressing 4 on the phone keypad.
dtmf-5.caf – is the sound played when pressing 5 on the phone keypad.
dtmf-6.caf – is the sound played when pressing 6 on the phone keypad.
dtmf-7.caf – is the sound played when pressing 7 on the phone keypad.
dtmf-8.caf – is the sound played when pressing 8 on the phone keypad.
dtmf-9.caf – is the sound played when pressing 9 on the phone keypad.
dtmf-pound.caf – is the sound played when pressing # on the phone keypad.
dtmf-star.caf – is the sound played when pressing * on the phone keypad.
lock.caf – is the sound played when pressing the Sleep/Wake button.
long_low_short_high.caf
low_power.caf
mail-sent.caf – is the sound played when sending an email.
middle_9_short_double_low.caf
new-mail.caf – is the sound played when an email is received.
photoShutter.caf – is the sound played when taking a picture.
ReceivedMessage.caf
RingerChanged.caf
SentMessage.caf
short_double_high.caf
short_double_low.caf
short_low_high.caf
SIMToolkitCallDropped.caf
SIMToolkitGeneralBeep.caf
SIMToolkitNegativeACK.caf
SIMToolkitPositiveACK.caf
SIMToolkitSMS.caf
sms-received1.caf – is the sound called Tri-tone, for text message receipt.
sms-received2.caf – is the sound called Chime, for text message receipt.
sms-received3.caf – is the sound called Glass, for text message receipt.
sms-received4.caf – is the sound called Horn, for text message receipt.
sms-received5.caf – is the sound called Bell, for text message receipt.
sms-received6.caf – is the sound called Electronic, for text message receipt.
sq_alarm.caf
sq_beep-beep.caf
sq_lock.caf
sq_tock.caf
Tink.caf
Tock.caf
unlock.caf – is the sound played when you “slide to unlock”.
ussd.caf
Voicemail.caf – is the sound played when you receive a voicemail message. |
I recommend downloading all the files in this folder to your Mac, and listening to what the various sounds do in a Finder window before you replace them. Note: Backup these files before replacing them on the iPhone with your own sound files! You must name your files the exact same thing as the one you are replacing.
As far as ringtones are concerned, /private/var/stash/Ringtones contains the stock ringtones only. Custom ringtone sounds are placed in /private/var/mobile/Media/iTunes_Control/Ringtones.
Step 1.
Let’s replace a sound. Choose a file on your computer that you like. Here’s my example in iTunes, note it is in mp3 format already.
The first step is converting your file to aiff format. If you right click the file and get only an option to convert it to mp3 like here….
Then you need to change your preferences in iTunes. Click iTunes, then select Preferences.
Click the Advanced graphic, then the Importing tab, and go to the Import Using drop down box, and select AIFF Encoder, then click OK.
Now when you go back to iTunes and right click your new sound file you will see the AIFF conversion option.
The conversion will be made and the sound will be placed in your library. So now I have an mp3 and an aiff version. Note: the aiff file was placed in the main library. I dragged it back into this folder so it could be seen easier.
I then dragged the aiff file out of iTunes to my desktop.

Now click the file name so it becomes editable. Change the aif extension to caf.
You’ll be prompted to confirm the extension change. Click Use .caf.
There is the properly formatted .caf. Now you need to name the file the same thing as the file on the iPhone you want to replace. In my case I want to change the lock.caf file with my own. So I renamed it.
I am going to put this sound into the same theme as my iZipper sliders theme. Go into the folder called UISounds.
Place the file in here.
Step 2.
Launch WinterBoard, and press the theme twice to load the new changes.
Ready to change the Springboard page indicators?
Section 12: Changing the SpringBoard page indicators
Note: If you replace any graphic with your own custom graphic, make sure you are saving the file as a png, and that it retains the same dimensions as the original.
I got the idea for this section when I ran across a theme on Cydia called No Page Dots. These “dots” appear on the SpringBoard when you have more than one full screen of program icons, they are normally white and gray in color. They are technically called page indicators. All this No Page Dots theme does is make these page indicators trasnaparent. You could make these indicators any shape or color you want. The original images are only 6 pixels in width by 6 pixels in height, so you don’t have a lot to work with here. You could make them into triangles or Xs or dashes. I’m going to turn mine into colored squares.
Here is what the page indicators look like normally, and after installing the No Page Dots theme.
Here are the two stock images that need to be modified: UIPageIndicator.png and UIPageIndicatorCurrent.png. These are the original files (converted to display). Note: They are being dispalyed in a black table so that you can see them clearly, they are perfectly fine to download.
Step 1.
Once you have your images created, make a folder for them in your Themes.xxxxxx folder. I’m calling mine Colored page indicators.
Now go into this folder
Create a folder called UIImages.
Now go into this folder.
Now copy your images into this folder.
Step 2.
Launch WinterBoard, and check out your new theme.
Ready to customize your lock screen?
Section 13: Simplifying the lock screen.
Note: If you replace any graphic with your own custom graphic, make sure you are saving the file as a png, and that it retains the same dimensions as the original.
I’ve seen a few people clean up their lock screens so they could better see their wallpaper image, and I kind of like it. This time I’ll start of by showing you the end result first. On first glance, you might think that there is no way to unlock the iPhone since there is no slider in the image on the right. However, it works perfectly fine. The graphics are still there, they are just transparent. Personally, I think this would look better if the time and date didn’t display, or if it could be centered, lower on the screen. If someone knows how to do this, I’d like to hear from you so I can add that to this tutorial.
Should you do this, you should be aware of two drawbacks: when you turn the iPhone off, or answer a call, the graphics you made disappear on your lock screen will disappear on these screens as well. Note: I put a black bar over the area where my phone number displayed for the purposes of this demonstration, this has nothing to do with the graphics that must be modified.
Step 1.
Download this collection of files. It contains everything you will need. Decompress this file and you will be left with a folder.
Step 2.
Launch Fugu and log into your iPhone and head to your /Library/Themes folder. Copy the folder you downloaded to the Themes folder.
Step 3.
There is a file in the folder you downloaded that needs to be copied elsewhere onto your iPhone. It’s ok that it’s in your theme folder, but it won’t do what it is supposed to there. Navigate to your /System/Library/CoreServices/SpringBoard.app/English.lproj folder. You should see a file named SpringBoard.strings. Right click this file, and select Rename.
Rename your file to SpringBoard.stringsORIGINAL. You can then easily restore this file by renaming it.
Copy the SpringBoard.strings file from the folder you downloaded to your English.Iproj folder.
Step 4.
Launch WinterBoard, and select your new theme.
Ready to give your phone’s keypad a facelift?
Section 14: Custom keypad dialer.
Note: If you replace any graphic with your own custom graphic, make sure you are saving the file as a png, and that it retains the same dimensions as the original.
Let’s face it, the stock phone keypad is BORING looking. You can download themes on Cydia (in conjunction with WinterBoard) to spice up your dialing experience like this. This dialer is called Leaf Dialer.
But I want to show you how to put your own personal photo on your keypad, to achieve something like this. You can also change the numbers and letters and get rid of the grid lines if you wanted… I then went a step further and made the next image. I won’t be showing you how to do this, it’s very time consuming (at least the first time). But if you analyze how other themes are made, you can duplicate the process with trial and error.
Step 1.
Find an image you want to use for your keypad. It must be 320 pixels in width by 273 pixels in height. You’ll also need to superimpose the numbers for the keypad over your image, or you’re going to have to guess where the buttons are.
I’ve simplified this process by providing this Adobe Photoshop template graphic in PSD format which will allow you to layer the numbers and letters, and the separator lines over your image.
In this image you see the template file I provide with all the layers turned on. Your image goes on the “your picture goes here” layer. The “Apple stock image” layer is the grid that divides the buttons. You could also turn off the visibility of the numbers or the letters if you want.
When you are done compiling your graphic, simply save it as a png file and name it dialerkeypad.png
Step 2.
At this stage you have a choice to make. If you use just this single image for your keypad (dialerkeypad.png), your buttons will look like this when you press them.
If this is okay, then skip ahead to Step 3. If this is not okay, then you can have the buttons visually do nothing (it will dial numbers, your image won’t change is all). To do this, duplicate your custom dialerkeypad.png image and rename it dialerkeypad_pressed.png.
There is one more option. You could color the numbers like this.
To do this, go back to the template with your photograph in it. Make whatever changes you’d like to the numbers or the letters, and save this image as dialerkeypad_pressed.png
Step 3.
Launch Fugu and navigate to your /Library/Themes.xxxxxx folder. Click the New Folder button and name this new theme Custom dialer.
Double click to go into this new folder.
Now make a folder called Folders.
Go inside this folder.
Make a folder called MobilePhone.app.
Go inside this folder.
Copy your image(s) into this folder.
Launch WinterBoard and try out your new theme.
Keep in mind this is a very basic tutorial. Try downloading some keypads from Cydia, and explore their contents to see what other images you can change. The Leaf Dialer I showed at the beginning of this tutorial modifies several other graphics to theme even more of the keypad. It is not as hard as it looks to do this.
Ready to give change some fonts?
Section 15: Changing SpringBoard fonts, font sizes, and font colors.
WinterBoard has made changing certain fonts on the iPhone very easy. There is a package of fonts on Cydia called WinterBoard Font Pack, which contains 19 fonts. These fonts will only work for the text for your program icons, they do not work in the Notes application or on other screens like Settings. I do have another tutorial that covers how to change the Notes application text, and other system fonts here.
Here is a sample of some of the better looking fonts in this package:
Now that Cydia has made changing fonts push button easy (like every thing else), I want to show you how this is done. You only need one file, and it’s called info.plist You can change the font type, and change the font pixel size for icon names that appear on the SpringBoard. There are two types of icons: undocked icons, which are above the row where Phone, Mail, Safari and iPod live, and the docked icons which are the programs I just mentioned. This is what the file looks like.
Once you’ve made your info.plist, go to your Themes.xxxxxx folder.
Then make a new folder named after your theme.
Now put your info.plist file into this folder
Try out your new theme.
The fun doesn’t stop there. You can also change the colors of your SpringBoard font. There is a package on Cydia called Font Colors. Here are what a couple of the colors look like. It not only changes the program name color, but the time as well.
Note in this particular color theme, the Navigation Bar is set to a value of 1, which makes menu titles like “Settings”, appear on a black background instead of the default blue gradient. You can mix and match this style as well. Change the value to 0 and you will have the default background color. Also note the TimeStyle setting. This changes the color of the clock on the SpringBoard only.
Once you’ve made your info.plist, go to your Themes.xxxxxx folder.
Then make a new folder named after your theme.
Now put your info.plist file into this folder
Try out your new theme.
There is one last thing you can change and that is the Calendar icon text. The day and date are both displayed, and you should be able to change the font type, size, and color. I didn’t have any luck changing font families, but could change the size, and color. Here is my before and after.
Once again, you modify this with an info.plist file. At a minimum, here is what that file looks like.
Once you’ve made your info.plist, go to your Themes.xxxxxx folder.
Then make a new folder named after your theme.
Now put your info.plist file into this folder

Try out your new theme.


 Jailbreaking an iPhone is legally allowed. The Library of Congress included jailbreaking as an allowed exemption to the Digital Millennium Copyright Act (DMCA) as found in the United States Code of Federal Regulations, Title 37 Part 201.40, in 2010. You can read their ruling
  Unlocking (from a CDMA perspective) doesn’t apply to the Sprint or Verizon networks. These providers must provision your iPhone to work on their network. You can’t just run an unlocking program to gain access to their network at will, like you can with GSM networks. iPhones that use GSM technology only can’t be made to operate with CDMA network providers. They are incompatible technologies. It’s like trying to stick a Betamax tape into a VHS machine.