I am going to demonstrate three methods for putting custom ringtones onto your iPhone. First I will use a free program called MakeiPhoneringtone. Second I’ll show you how to rename a music file and use iTunes to do all the work. Finally, I’ll demonstrate how GarageBand accomplishes this task. These methods all work on iTunes version 7.6.2 – which is especially if you’re using Bedpage apps or have contacts in your phone your DON’T want your significant other to know about.
Method 1 – Step 1.
Thanks to the fine folks over at Rogue Amoeba, Mac users have an unbelievably simple way to add their own ringtones to the iPhone. You can read more about this program here.
Download the program MakeiPhoneRingtone v1.3 here. Decompress the zip and launch the program. If you have a ringtone already in AAC format, skip to Step 3.
Method 1 – Step 2.
This program only accepts files in .AAC format. You can easily use iTunes to convert between file formats. First try to right click the file and select Convert Selection to AAC. You would then drag the converted file off to your dekstop.
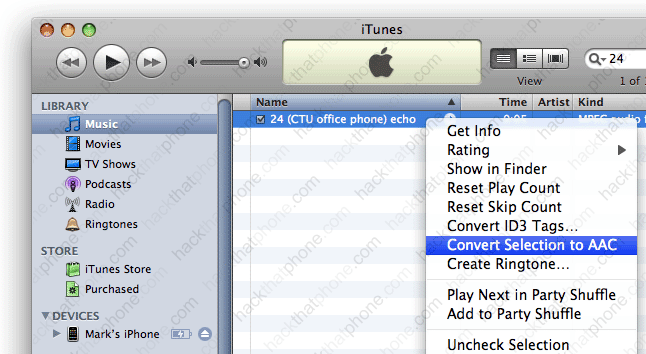
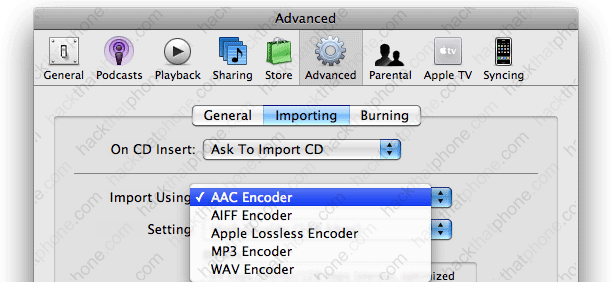
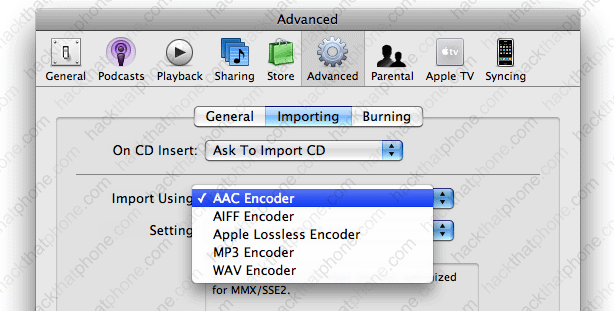
If you do not have this menu selection, then go into iTunes preferences, click the Advanced tab, click the Importing tab, then click the drop down box for Import Using, and select AAC Encoder.
Method 1 – Step 3.
Drag your ringtone onto the program. If you don’t see the green + symbol, then your file isn’t in the proper format.
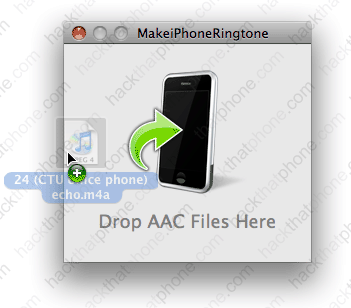
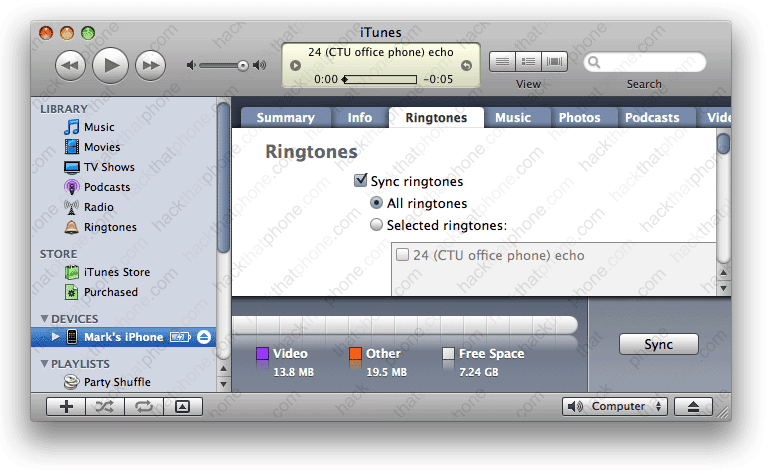
The ringtone will now appear in the ringtones folder in iTunes. Simply sync your iPhone now.
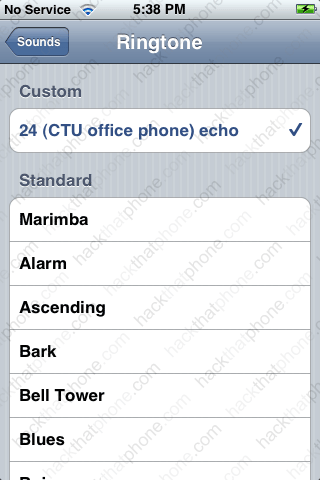
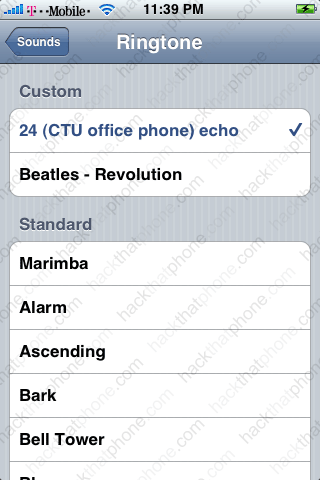
Custom ringtones are placed at the top of the list in a separate category.
Method 2 – Step 1.
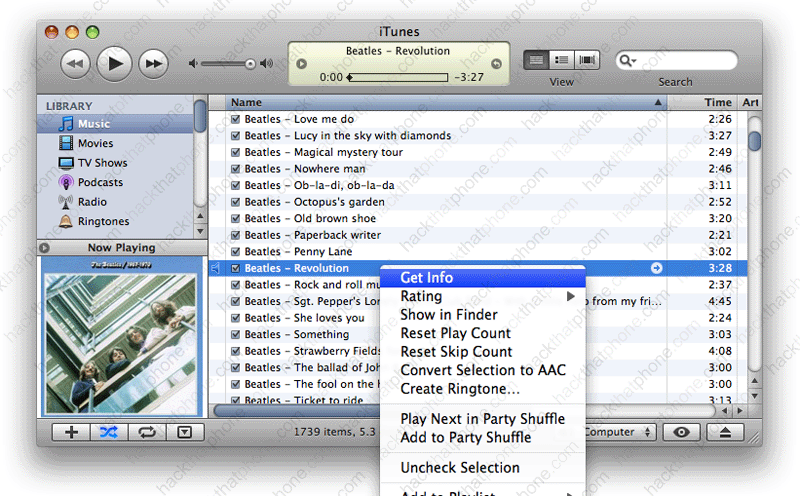
Now we’ll use a simple trick where you rename a file type extension to make ringtones work by using only iTunes. Launch iTunes and select a non-DRM song to use. Right click the song and select Get Info.
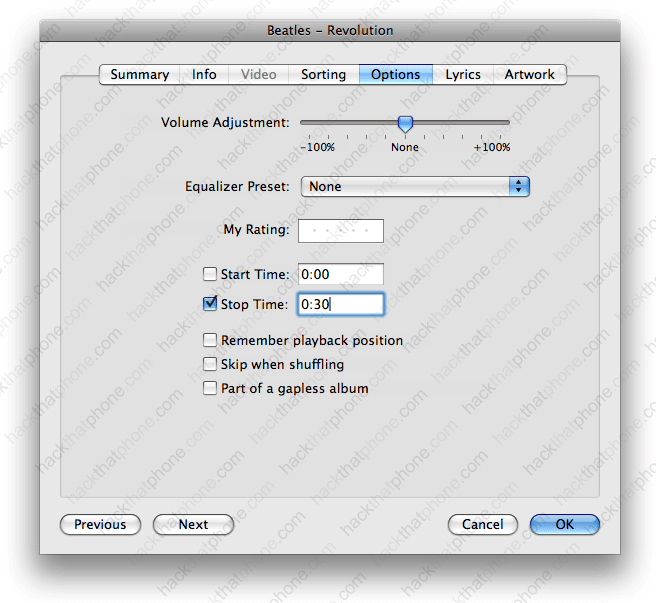
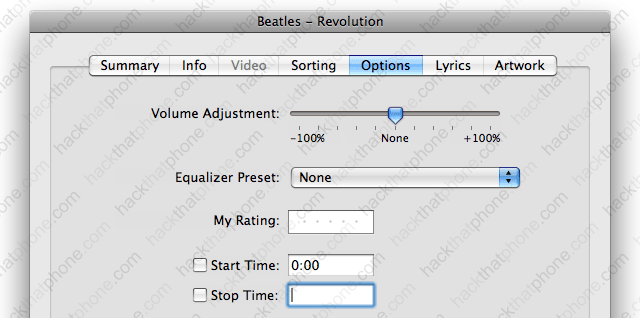
Go to the Options tab and specify the start and stop time for your ringtone. Click OK.
Right click the song name again, and select Convert Selection to AAC.

Note: If you do not have this option, then go to the program bar at the top of your screen, click iTunes, Preferences, go to the Advanced tab, click the Importing tab and go to the Import Using drop down box and select AAC Encoder.
You will now see a second instance of the song you selected. Notice that it is only 30 seconds long (or however long you selected).
![]()
Method 2 – Step 2.
Drag the duplicate of the song out of iTunes and rename the extension from .m4a to .m4r.

Method 2 – Step 3.
Drag the file back into iTunes and it will appear in the ringtones folder.

Don’t forget to go back to your original song and erase the custom start and stop times so it will play normally.
Method 2 – Step 4.
Now sync normally and you’ll see your new ringtone.
Method 3 – Step 1.
Apple has also provided a way to create ringtones via GarageBand. Launch GarageBand and select Create New Music Project.
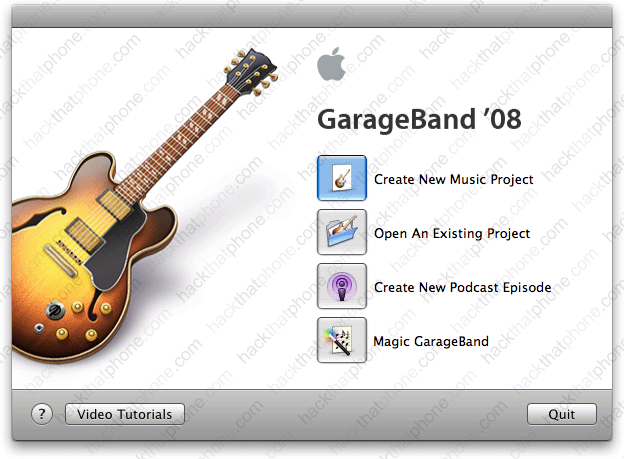
Name your project and click Create.
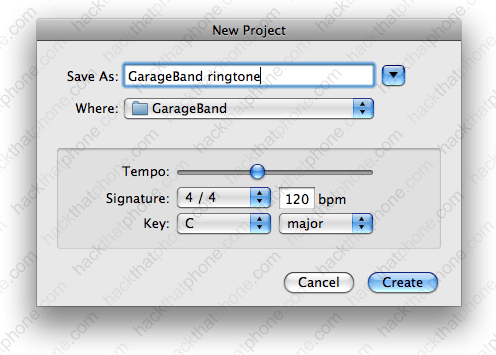
You are now looking at a keyboard, but you can pick any instrument. You can also drag sound files into this program and work on them here.
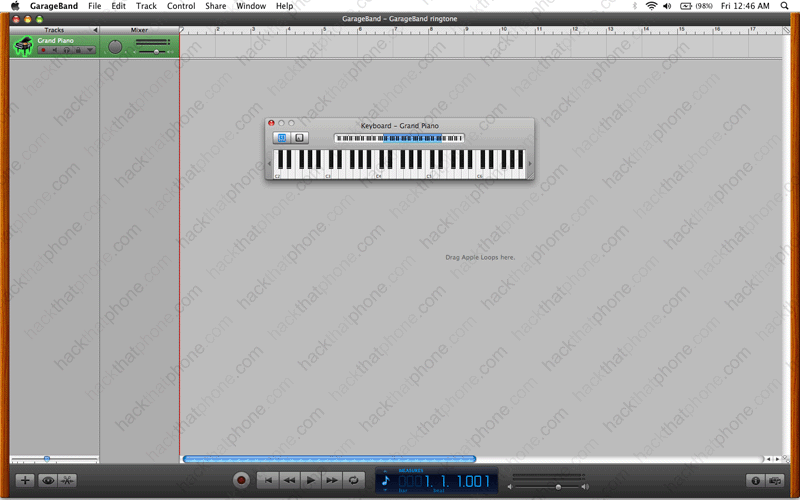
To begin, click the round red button to start recording.

When you are done composing, click the record button again to stop. Click Share then Send Ringtone to iTunes.

You may see this pop up next. I just clicked Adjust.
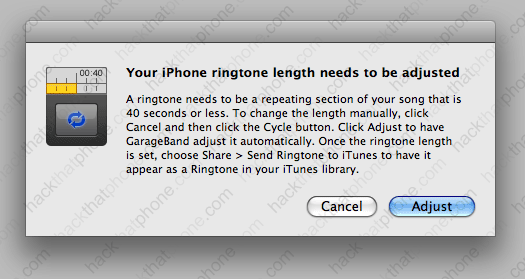
Once again, click Share, then Send Ringtone to iTunes. iTunes will launch and the ringtone will be imported.

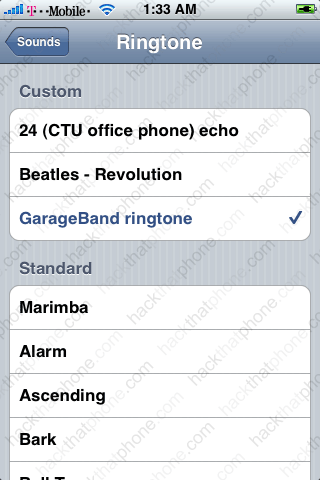
Sync your iPhone and test your new ringtone.
If you would also like to replace system sounds here’s how
Attention
I will be using Fugu to upload the files in this tutorial. These instructions can be applied to any files you want to add to your iPhone, provided you already have SSH installed. If you have not installed BSD Subsystem, OpenSSH, or BossPrefs (via the Installer) or used Fugu before, then you must read this tutorial first.
These instructions were contributed by “Christian” “Ksilebo”, and “TkN”. For the ultimate in customization, you can follow these steps to change your system sounds for new mail, new sms, new voicemail, et cetera. Remember you will be updating the system sounds, you can always restore them with a full restore if you don’t back up the original files.
These are the default system files, and they are found in /System/Library/Audio/UISounds
alarm.caf, beep-beep.caf, dtmf-2.caf, dtmf-0.caf, dtmf-1.caf, dtmf-3.caf, dtmf-4.caf, dtmf-5.caf, dtmf-6.caf, dtmf-7.caf, dtmf-8.caf, dtmf-9.caf, dtmf-pound.caf, dtmf-star.caf, lock.caf, long_low_short_high.caf, low_power.caf, mail-sent.caf, middle_9_short_double_low.caf, New-mail.caf, photoShutter.caf, ReceivedMessage.caf, RingerChanged.caf, SentMessage.caf, short_double_high.caf, short_double_low.caf, short_low_high.caf, SIMToolkitCallDropped.caf, SIMToolkitGeneralBeep.caf, SIMToolkitNegativeACK.caf, SIMToolkitPositiveACK.caf, SIMToolkitSMS.caf, sms-received.caf, Tink.caf, Tock.caf, unlock.caf, ussd.caf, Voicemail.caf
Choose a file on your computer that you like. Here’s my example in iTunes, note it is in mp3 format already.
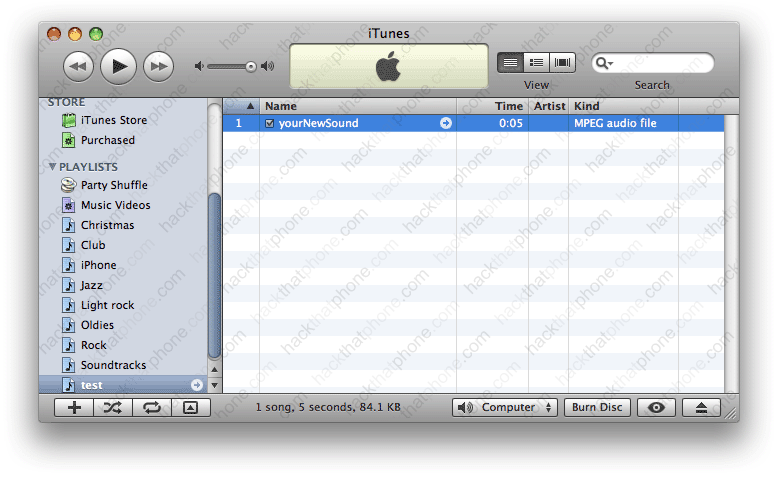
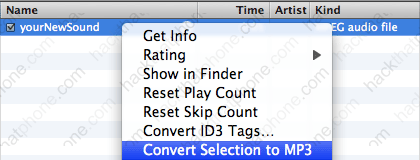
The first step is converting your file to aiff format. If you right click the file and get only an option to convert it to mp3 like here….
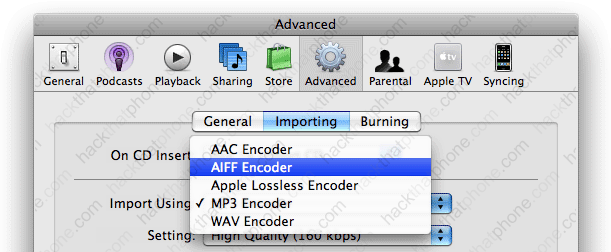
Then you need to change your preferences in iTunes. Click “iTunes” then select “Preferences”.

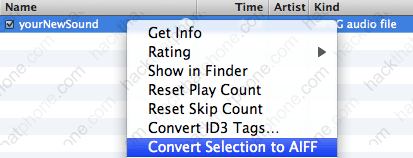
Now when you go back to iTunes and right click your new sound file you will see the AIFF conversion option.
The conversion will be made and the sound will be placed in your library. So now I have an mp3 and an aiff version. Note: the aiff file was placed in the main library. I dragged it back into this folder so it could be seen easier.
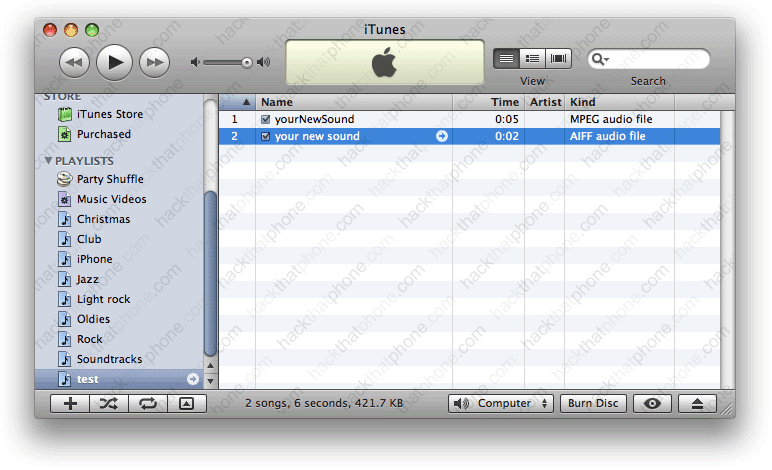
I then dragged the aiff file out of iTunes to my desktop.

Now click the file name so it becomes editable. Change the aif extension to caf.

You’ll be prompted to confirm the extension change. Click “Use .caf”.
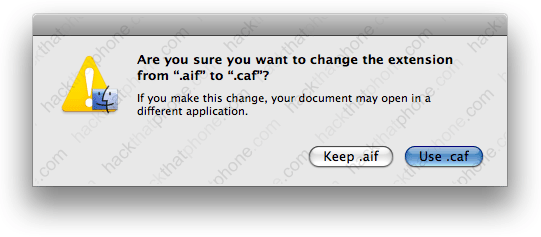
There is the properly formatted .caf. Now you need to name the file the same thing as the file on the iPhone you want to replace. In my case I want to change the unlock.caf file with my own. So I renamed it.

Using Fugu navigate to the location of your new audio file and the /System/Library/Audio/UISounds folder.
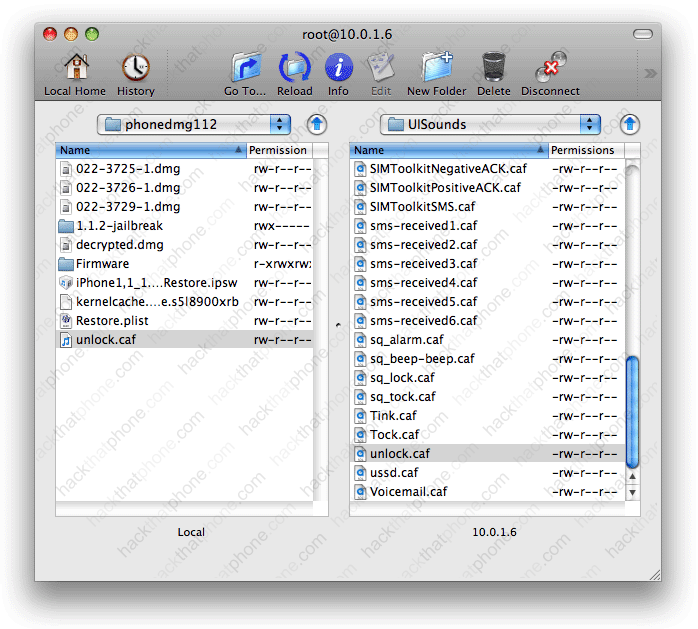
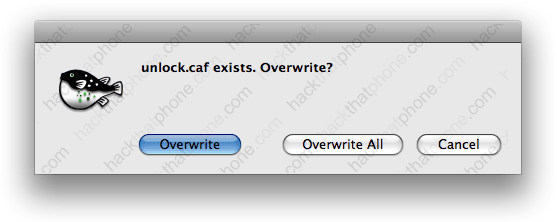
Drag your new .caf file over and confirm the overwrite by clicking “Overwrite”. You may need to reboot the iPhone for the change to be made.
